
12 step a first aid stick for your PC
Tech
February 12, 2016 17:00
- Your computer refuses to boot? Or do you want a computer system to which the soap is still retrieve your personal information? The rescue comes a bootable USB drive with emergency software: Paragon Rescue Kit. Make sure you make that solution in advance.
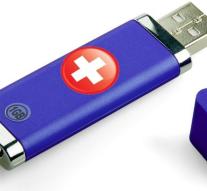
Our savior is here. Here awaits a sturdy download of up to 299 MB. Open the file rk14_free. exe and let the installer do its thing. It is intended that the recovery software is operated from an external bootable media with the internal system of the PC you need to take more into account. That external media must be bootable. It could be a DVD, an external hard drive or a USB stick. In this article, we use a small USB stickje 2GB, large enough to contain the Paragon software and an operating system. \x3d Quot; http: gt;
Tip 01 The software is free for personal use.
Insert the USB stick in the machine and open Paragon Rescue Kit 14 Free. That way you'll be right in the module to create recovery media, namely the Recovery Media Builder. In the opening screen, two large buttons allow to create a bootable recovery media: one for x86 systems and one for x64-based system (ie a 32 and a 64bit system). There is also a button to open the manual and to register a button. The software is free, but if you do not register right away, you should still do it later.
Tip 02 Is the PC a 32bit system (also known as x86) or 64bit computer?
In the next screen, it looks like you have only two choices and that's not entirely true. In Advanced mode you can change the network and in Use ADK / WAIK you will be guided to a Windows download more than 5GB. In most cases you do not need either of these options. Follow the little instruction links below: To continuously, click Next. Let's do that. Who just now has not registered should do so in the next screen indeed. That means you (free of charge) must request a product key and serial number. Both data arrive directly in your mailbox. We want to want to accept well that Paragon will not send spam, but a special disposable mailbox for such records we still use for security reasons.
Tip 03 Do not choose either option, but click Next.
Decide how long you can work this temporary address.
To make the USB drive bootable, the wizard will install the OS on a USB stick. You have a choice of Microsoft Windows PE (a sort of light version of Windows) or Linux. In this example, we will go for Windows PE. Click Next in the next window so you can select the medium on which the software recovery will come. That may be an ISO file which you then burn it to a DVD or USB stick. You will receive an ultimate warning that by continuing the contents of the USB stick is lost. Attach and a few minutes later you get the message that the bootable drive is ready for use.
Tip 04 We select Windows PE operating system.
Of course you do not want to wait until the unfortunate day when you have the Rescue Kit really needed. Test immediately or you can boot from the USB stick. Make sure the drive is in a USB port and press the appropriate key (combination) to see the boot menu of your PC. With us is F12, but it varies by system. This boot menu you specify which devices you want to start: in our case, USB Storage Device. Then, press the Enter key. Some older PCs you need to change the boot order in the BIOS. How do you do that, you can read the best in the manual of PC or motherboard.
Tip 05 In the boot menu that you want to boot from the USB stick.
After the system is booted into Windows PE only really opens the recovery suite where several tools ready for various disaster scenarios. This allows you to back up your system on a virtual hard drive or you can through Restore from Virtual Disk to recover the system. Is the system crashed, the Postmortem Postmortem Backup and Restore helps you to save your data. There is Boot Corrector to fix startup problems, a wizard to copy files to other media, a tool to install drivers, a tool to recover deleted partition and a function to configure the network.
Tip 06 Once booted you automatically when the recovery tools suite.
If your local network is connected to a DHCP server will automatically be applied to a network when the computer is booted from the stick into Windows PE. If that is not successful, you can manually via the network module of Paragon Rescue Kit to connect. For that you click the Network Setup button. Then give you an IP address for the subnet mask and default gateway. To go to a network, click the Network tab drives. Then use the button with three dots to browse through the network.
Tip 07 Windows PE will in most cases from the DHCP server to receive an IP address.
To make a regular backup of the entire hard drive, click on the button Backup to Virtual Disk. Follow the wizard until you reach the screen is where you can select the disc you want to copy. In the next window, choose the location where the program should place the backup image. That may be a hard drive or a location on a network drive. You read how much space will take the backup image and how much space is still available on the destination disk. Then the tool will write the partition to a virtual container. To restore from this backup container open Restore from Virtual Disk. Just select the image and choose the hard drive of the PC to be restored.
Tip 08 Select the drive you want to back up.
The main difference from the Postmortem Backup and Virtual Disk backup is that the first can make a backup of separate partitions. The Virtual Disk Backup to make a copy of the entire hard drive. If the Postmortem Backup Wizard opens, you come to the hard disk and partitions that you can create a backup copy. Place a check in the volumes that you want to protect. In the next window you come to the Backup Destination. Here you select one of four options where you want to save the backup: an external backup drive, on a local or network drive, on a partition, or on a CD / DVD. If you add a simple comment to the copy to finally start the backup process. To restore the data, you just follow the wizard Postmortem Restore.
Tip 09 Select the volumes that you want to back up.
Suppose a PC it refuses to boot by itself, you usually can get to the contents of the hard drive when you boot the prepared USB stick. This way you can save documents, photos and media files by copying them to an external hard drive for example. That's a job for the File Transfer module. Using the wizard you come to a window where you are in the right hand column to read the contents of all media that recognizes File Transfer. Use the arrow buttons to select the folders that you need to be placed in the clipboard. Are you ready, then click Next to navigate to the location where this tool will bring the selected folders and files safe.
Tip 10 Place in the box Clipboard folders and files you want to copy to a different medium.
With the Boot Corrector button in the main menu of the Rescue Kit can fix most startup problems. If it is not a hardware problem or malware infection, chances are that this tool the savior. Boot Corrector Wizard finds out if the problem has to do with a damaged system and corrects the problem until it comes to Windows 2000 / XP / Vista / Server / 7/8/8. 1. We read in the support section nothing about startup repair Windows 10. This module also corrects the Master Boot Record (MBR). This is the information on the first sector of a hard disk. The MBR holds example in which operating system is contained on the disc and what the computer should load at startup in memory. MBR is damaged, the computer does not even remember that it runs on Windows. This tool also fixes incorrect drive letters in the registry.
Tip 11 The Boot Corrector is able to cope with the current software startup problems.
Have you accidentally deleted a partition without erasing that effectively, you can retrace your steps with Undelete Partition. When you have deleted a partition simple disk management software will only reference to remove the partition in the partition table and this can make you happy even reversed through this module.
Finally Paragon Rescue Kit is a tool to install specific drivers, if you have at least drivers at hand. Start the Load Drivers and navigate to the location on a hard drive, CD or network location where such. inf file or driver package it, and click Open. This tool indicates when the driver is installed correctly.
Tip 12 As long as the partition is not actually overwritten, save it.
Leave a comment